Welcome to part 2 of the
introduction to XNA series. Last time we converted the TinyTennis sample to use the XNA framework for rendering
and keyboard input. However at the time that article was written deployment was not available on the Xbox 360. In this article you will make additional
changes to the project to enable the game to be deployed and played on your Xbox 360.
Before you go any further I need to explain how
XNA works on the Xbox 360. Microsoft created a version of the .Net compact framework that runs on the Xbox 360, as well as Xbox versions of the XNA
assemblies. To get these assemblies onto your Xbox 360 and enable deployment of XNA framework requires that you join the Creators Club which has a cost associated. The changes you will make for this article will work on the PC too, but you will
not be able to play on the Xbox 360 without this. Microsoft have provided a video to help you get this installed: Getting Started with the XNA Creators Club
Some people have asked why I am
using such a simple game for these articles. My reasoning is that I do not want to introduce many new things at the same time. TinyTennis is a very
simple game and the GDI version has been on MSDN for a long time now and is well documented so I do not need much explanation. Future articles will use
more advanced code such as the SpaceWar starter kit.
Errata for part 1
Firstly an update to part 1. In the rush to get the article out at launch date I converted all the GDI PointF
structs into XNA Point structs. This meant that everything was stored as integers rather than floating point values. The rounding is not noticeable in a
game this simple, but it was incorrect. The correct thing to do was convert to XNA Vector2 structs and this has been corrected in the article and the code for part 1.
Making it work with Gamepads
Those of you with an Xbox 360 will notice that there is no keyboard so controlling the paddles
will be a problem. In fact the Xbox 360 does support a standard USB keyboard if you plug one in, its just that very few games look for this input device
so there is little point in coding for it and certainly no point in mandating it. All Xbox 360 games of course work with the gamepads and TinyTennis
will be no exception.
Xbox 360 gamepads work on the PC as well as on the Xbox. If you have wired controllers you can just plug them
in to a vacant USB port and let Windows download the drivers. If you have wireless controllers then you need to buy the wireless controller adapter for
windows. Note that the charging pack looks like it has a USB connection but that is purely to take electricity to charge the controller – it won’t allow
you to use the controller on Windows. In addition since the XNA framework only supports the XInput API you can ONLY use
controllers that support this API. In general right now this is Xbox 360 controllers. Any older controllers rely on the DirectInput API which is not
available in the XNA framework.
Reading the gamepad is as simple as reading the keyboard in XNA. You simple get the current state
of a particular gamepad using the PlayerIndex enumeration (one, two, three or four corresponding to the players) and then read strongly named properties
from the gamepad.
Firstly you need to know which player controls each bat so add a PlayerIndex field to bat.cs and modify the
constructor to take a PlayerIndex:
private PlayerIndex _playerIndex;
public Bat(int x, Keys up, Keys down, float minPosition, float maxPosition, PlayerIndex playerIndex)
: base()
{
initialize(x, minPosition, maxPosition);

//Keys to control this sprite
_upKey = up;
_downKey = down;

_playerIndex = playerIndex;
_isHuman = true;
}
When the bat is created in the constructor of TinyTennis.cs you need to pass in the correct PlayerIndex for each bat (note
player 2 is the commented out line)
//Create the bat Sprites - they need the keyboard controls and the gameplay area limits
_player1 = new Bat(30, Keys.Q, Keys.A, 0, Window.ClientBounds.Height, PlayerIndex.One);

//use this line for a second human player
//_player2 = new Bat(Window.ClientBounds.Width - 30 - Bat.Width, Keys.P, Keys.L, 0, Window.ClientBounds.Height,

PlayerIndex.Two);
Finally change the humanMove function in bat.cs to read the gamepad state for the correct
gamepad.
private void humanMove()
{
KeyboardState keyState = Keyboard.GetState();
GamePadState padState = GamePad.GetState(_playerIndex);

double velocity = 0.0;
//Set the velocity of the sprite based on which keys are pressed
if (keyState.IsKeyDown(_upKey) || padState.DPad.Up == ButtonState.Pressed)
{
velocity += -_speed;
}
if (keyState.IsKeyDown(_downKey) || padState.DPad.Down == ButtonState.Pressed)
{
velocity += _speed;
}
Velocity.Y = (int)velocity;
}
Replacing Windows Sound with XACT
TinyTennis
only has one sound for when the ball bounces. The code currently uses the SoundPlayer class from System.Media. Unfortunately System.Media is one of the
assemblies which is not availalbe in the version of the .Net framework on the Xbox 360. The only audio API available on the Xbox is called XACT and its
exposed in the Microsoft.Xna.Framework.Audio namespace in the XNA framework.
In addition to being the name of the API, XACT also
contains a fairly complex sound management tool. In AAA titles the sound guy on the team uses XACT to create a bank of sounds that the programmer can
simply play by referring to a ‘cue’. The idea behind it is to separate the work the audio guy does away from the programmer in the same way as a 3D
modeling tool allows an artist to work away from the programmer. If this sounds too complex just to play the bounce sound then you are right – XACT is
overkill for this. But its the only way to play sounds at the moment, and thankfully you do not need to learn very much XACT to be able to play a WAV
file.
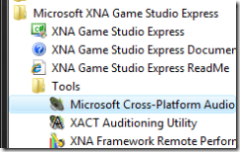
Start by running the XACT tool from the start menu. Note that you MUST use the version of XACT
that ships with XNA Game Studio Express and not one that you may find in a DirectX SDK. The file formats for XACT projects changes almost every SDK
release and the XNA framework only understands the one it was shipped with. Also note that if you are running on Vista you should follow the instructions on Dave’s blog to get it to work, and also set it to run
as Admin. A future release of XNA Game Studio Express will make everything compatible with Vista.
You will see the XACT window:
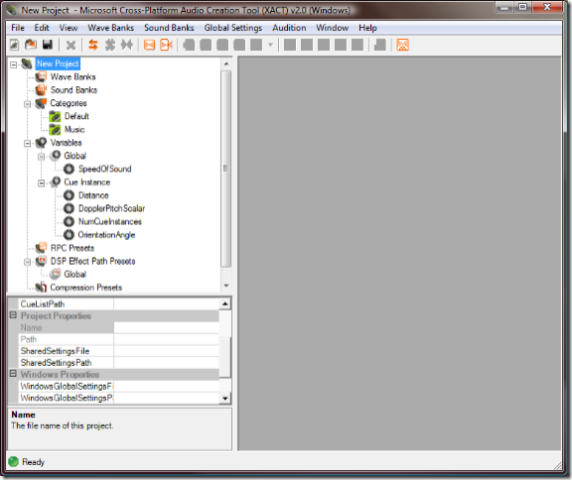
For TinyTennis you do not need to understand most of this. However there
are 2 concepts you need to grasp:
- Wavebank: This contains the raw sound files
- Soundbank:
This contains the ‘cues’ that you, as the programmer, will play.
In the case of TinyTennis the ‘cue’ will just play the raw
sound file but XACT gives an audio engineer a lot more flexibility than that such as merging multiple sound files, changing the pitch and volume and
applying reverb effects.
Create a new wavebank and soundbank by right clicking and selecting New

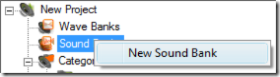
You will now see the wavebank and the soundbank windows
appear. Add the beep.wav from the project directory by right clicking the wavebank window and selecting Insert Wave Files. In Windows XP you can drag
and drop from Windows Explorer into the wavebank window.

Then drag the beep from the wave bank window into the top half
of the sound bank window (the Sound Name section). Then drag the ‘beep’ sound into the lower half of the sound bank window (the Cue Name) section. You
will end up with something that looks like this:

What you have done is created an XACT cue that plays a sound
which just contains a single wave file.
Now save the XACT project as TinyTennis.xap in the project folder.
XNA
Game Studio Express understands .xap files and will compile correct Windows or Xbox 360 versions when the project is compiled. So the only remaining
thing to do is add the .xap to the project. Simple browse and add. Since the .xap file knows which .wav files are required you do not need to explicitly
reference beep.wav any more so it can be ‘excluded from project’ (Do not use ‘delete’ as that will actually remove the file from disc and the .xap file
references it).
Playing the sound is a little more complex that the 2 lines of code required with the SoundPlayer class but its much
more flexible. For a start you can have more than one sound playing at a time which is n
ot possible with SoundPlayer.
The XACT
sound engine needs to be initialized when the game starts up so add the following declarations to TinyTennis.cs (note this was called Game1.cs in part1
– I have renamed it for obvious reasons)
private static AudioEngine engine;
private static WaveBank wavebank;
public static SoundBank soundbank;
and then
initialize the engine inside the Initialize() function
protected override void Initialize()
{
engine = new AudioEngine(@"tinytennis.xgs");
wavebank = new WaveBank(engine, @"wave bank.xwb");
soundbank = new SoundBank(engine, @"sound bank.xsb");
In ball.cs you can remove the using statement for System.Media and add in Microsoft.Xna.Framework.Audio. Then remove all of the places
that _beep and SoundPlayer are used.
To play the sound using XACT is a single line replacement inside PlayBounceSound()
private void playBounceSound()
{
TinyTennis.soundbank.PlayCue("beep");
}
Compile and run and after all of that hard work you should be back exactly where you started, with the ball playing a beep
sound when it bounces.
Running TinyTennis on the Xbox 360
Game Studio
Express requires you to have separate projects for Windows and Xbox 360 development. For almost all XNA framework projects the source code is identical
between the two versions – any slight differences can be handled using #if XBOX – so maintaining 2 code trees is almost always more trouble than it is
worth. The easiest way to get round this is to create both projects in the same directory so that they can share files in a simple manner. You will
still have to remember to add a file to both projects when you make a new file but that is a simple drag and drop operation.
Firstly
create an empty Xbox 360 Game project somewhere on your hard drive – its a temporary location so anywhere will do. Then using
windows explorer copy the .csproj file into the TinyTennisXNA folder and add it to your solution as a second project. It will complain about the source
files that are missing but that doesn’t matter as we will add our own.
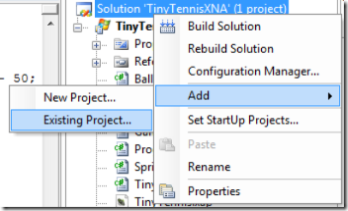
Rename the project to TinyTennis360, remove Game1.cs and then
drag and drop all the files from TinyTennisXNA into TinyTennis360 – from within the solution explorer. Even though the files are in the same directory
they will get added to the new project. Now if you modify bat.cs in one project it automatically gets updated in the other project too. The only thing
you have to do to keep in sync is remember to drag and drop any new files if you add them to one of the projects.

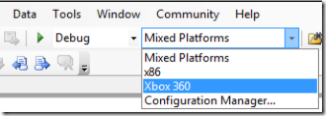
Now when you compile it will compile both projects. If you
only want to compile the windows or the Xbox one you can select it from the platform drop down on the men bar
Also remember that now you have 2 projects you need to
remember to set the right one to be the startup project by right clicking the project file. You will get confused when it tries to run the Xbox project
and deploy when you really wanted to debug the windows one.
Now that everything compiles its time to deploy it to the Xbox. Rather
than explain how to do it in words and pictures I recommend you take a look at the second half of the Getting Started with the XNA Creators Club video. If you fast forward to 6:02 you can see a
demo of how to create the connection between Game Studio Express and your 360 and how to put your Xbox in receive mode. Once that is done you just hit
f5 in Game Studio Express and the game will be deployed and run. Depending on what screen resolution you have set on your Xbox the paddles may not
appear in the expected place, but the game is still playable. To quit the game on the Xbox 360 press the ‘back’ button on gamepad 1.