XNA入门 (1):创建简单的弹球游戏
December 11th… a day that we all hope
will go down in history as the start of a new generation of hobbyist game developers. Today XNA Game Studio Express launches. It’s not
the first platform to allow home developers access to console development but its is the first one to be fully sanctioned and supported and running on a
retail console.
So where do you start? XNA Game Studio Express is going to interest people who have no game development experience at
all so starting with some simple games is a good idea. You may have seen the 3 games I did for MSDN for their Upgrade Your Game promotion – Tiny Tennis, Space Blitz and Crusader. For this series of articles I will walk you through simple XNA applications using as much code
from these starter kits as possible. The original tutorials and screencasts will walk you through the game logic and these articles will add in the XNA
know how.
Firstly a couple of points:
- Even The ZMan didn’t have access to the retail XBox 360 release before today so for the first part I will only cover the PC. Watch for
part 2 to add in the things needed to run on the 360 and go into more detail.
- XNA only supports Visual C# Express so although the original games were in Visual Basic, this series will be only in
C#
- You need to ensure you have C# Express and XNA Game Studio
Express
installed. If you have problems installing or running then ask in the XNA Game Studio Express Forum.
Making a new XNA game
Installing XNA Game Studio Express adds several new project types to C# Express:

The SpaceWar projects are complete games for the xbox and the windows platforms –
they have all the source code, graphics and sound and Microsoft absolutely want you to use this to make your own games as well as learn about
making simple 2d and 3d games.
The Windows Game and Xbox Game projects are for writing games on those 2 platforms and the Game Library
projects are for making reusable components that are easy to use within the XNA
game projects.
For this tutorial start with the Windows Game project. Once you have selected it you can immediately run the project and see a wonderful cornflower blue, blank screen. (It is widely speculated that cornflower blue is Tom Miller’s favorite color).
Now we need to add the project files from the Tiny Tennis sample.
Select Add Files by right clicking the project and then browse to the Tiny Tennis solution and add the following files:

Converting the Game
There
are going to be a LOT of errors right now because Tiny Tennis relies heavily on Windows.Forms and System.Drawing neither of which are available when
writing an XNA application that you eventually want to run on the Xbox 360 because the Xbox 360 does not support those libraries. So initially there are
several big changes to make.
Game1.cs is the main XNA game file. It contains the initializer for the game as well as several methods
that are called automatically for the game. If you have been through the tutorials for the Express games you will see that the games are designed to be
continually updated. As fast as possible the keyboard is read, the positions are updated and the screen is redrawn. This is exactly the same method used
in XNA so it is very simple for us to use the same logic.
You need to copy sections of code from the tennis.cs file into the
game1.cs.
Firstly the declarations:
private Bat _player2;
private Ball _ball;
private GameState gameState;
Then the
constructor which goes into the end of the Game1 constructor.
controls and the gameplay area limits
//_player2 = new Bat(player2Bat, ClientSize.Width – 30 – Bat.Width, Keys.P, Keys.L, 0, ClientSize.Height);
//use this line for a computer player
ClientSize.Width –
30 – Bat.Width, 0, ClientSize.Height); //Create the ball sprite. It needs the gameplay arealimits and references to the bats to be able to check for collisions
_player2.Ball = _ball;
The TinyTennis_Paint code gets moved into the Draw method in Game1.cs. The Draw method is
continually called by the XNA Game class and this is where you should draw your graphics.
_player1.Update(gameTime, elapsedTime);
_player2.Update(gameTime, elapsedTime);
_ball.Update(gameTime, elapsedTime); //Draw the scores
player1Score.Text = gameState.Player1Score.ToString();
player1Score.Refresh();
player2Score.Text = gameState.Player2Score.ToString();
player2Score.Refresh(); //and the game objects
_player1.Draw();
_player2.Draw();
_ball.Draw();
Notice that I have not copied across any of the timer/stopwatch code. XNA provides its own timer logic so that is not needed. Since XNA
does not support Windows forms, it does not support KeyUp and KeyDown events so the code for those is of no use to us. You can now remove TinyTennis.cs
from the project.
Now to fix up the errors. If you hit compile and walk through them one by one you will fix them in the
following order:
- The first thing to do is remove all the ‘using’ statements that mention Windows.Forms and System.Drawing. If you try to compile these
will be the first errors on the list.
- PointF in
System.Drawing is replaced by Vector2 in Microsoft.XNA.Framework. If you change the type to Vector2 you can use the intellisense feature of C# express
- There is no SizeF type in XNA. Since it is just a pair of values you can reuse Vector2 type so change SizeF to Vector2. Change the Width property to X
and the Height
- Color in System.Drawing is replaced by
Color in Microsoft.XNA.Framework. For most of these errors you just need to add the correct using statement with intellisense.
- In TinyTennis I used windows controls to do the rendering. Since this
is not possible in XNA all references to the Control type need to be removed
- in ball.cs and bat.cs remove the parameters in the constructor that refer to
Control
- ControlSprite is a wrapper around Sprite that
draws using windows controls. Since we no longer have windows controls we can remove ControlSprite from the project and just use the Sprite
implementation
- Now that ControlSprite is missing Ball
and Bat should be changed to inherit directly from Sprite
- In game1.cs remove the Control parameters from the new Bat() and new Ball() lines in the constructor
- in ball.cs and bat.cs remove the parameters in the constructor that refer to
- Keys is now found in Microsoft.Xna.Framework.Input so needs the correct using
statement
- ClientSize from Windows.Forms becomes
Window.ClientBounds from Microsoft.Xna.Framework
- In
the WindowsForms version of TinyTennis I tracked the game time myself. This code is redundant in XNA and is removed because the Game class passes in gametime to the Draw() function. So replace the elapsedTime property
with gameTime.ElapsedGameTime.TotalSeconds and the gameTime parameter with gameTime.TotalGameTime.TotalSeconds
//Perform any animation
_player1.Update(gameTime.TotalGameTime.TotalSeconds, gameTime.ElapsedGameTime.TotalSeconds);
_player2.Update(gameTime.TotalGameTime.TotalSeconds, gameTime.ElapsedGameTime.TotalSeconds);
_ball.Update(gameTime.TotalGameTime.TotalSeconds, gameTime.ElapsedGameTime.TotalSeconds); - There is no easy
way to draw text to the screen in XNA. So for this article I am simply going to avoid the subject until there is time to go into it in more detail.
Comment out the lines that display the score. You can use the ctrl-K-C keypress to easily to this. ctrl-K-U reverses it
//Draw the scores
//player1Score.Text = gameState.Player1Score.ToString();
//player1Score.Refresh();
//player2Score.Text = gameState.Player2Score.ToString();
//player2Score.Refresh(); - Since the
Point type uses integers in XNA there are some parameters to change to int from float and the calculations need to have their results cast into (int).
For example:
public virtual void Update(double gameTime, double elapsedTime)
{
//Move the sprite based on the velocity
Location.X += (int)(Velocity.X * (float)elapsedTime)
;
Location.Y += (int)(Velocity.Y * (float)elapsedTime)
;
}

So you should now have a project that compiles. However when it runs you
will see a runtime error about a missing sound file – copy the WAV file from the original project and add it to the project and set the proper
ties to
copy the file to the output directory. Now the project should compile and run but nothing will appear on the screen. This is to be expected since the
previous version used windows forms to do the rendering.
Using XNA to Render
The simplest way to draw anything in XNA is using the SpriteBatch class. This uses your graphics card to draw 2d rectangular areas on the
screen. Since Tiny Tennis uses rectangles this is perfect. The SpriteBatch allows
you to set the location and size of the rectangle – however it expects a graphic file to be used as the thing to draw. For TinyTennis a graphic file
which is all white will work perfectly. I created a small graphic file using Windows Paint and added it to the project.
If you look
at the file properties after you add the bitmap you will see another addition that XNA Game Studio Express adds. Image files are now a recognized
project item. This is what you may have heard of as the content pipeline. It allows game content to be created and checked at compile time and the
content to be treated as part of the game rather than some external files.
For the most part you don’t need to change or even look at the properties
window. Make a note of the Asset name – this is how you will be able to refer to it in code. It defaults to the name of the file without the type
extension.
Rendering involves 2 steps – loading the graphic and then using it to draw.
Loading the graphic
is done in the Game1.cs class. Using the already declared reference to the content pipeline it requires a simple declaration:
SpriteTexture
;and a single line of code in the LoadGraphicsContent
function:
{
if
(loadAllContent)
{
spriteTexture
}
}
To draw the sprite you need a sprite batch object for this simple application its easiest to just create a single
SpriteBatch and make it static so that the bats and balls can share it.
SpriteBatch
;And create it in the initialize function.
Drawing with
SpriteBatch has many overloads – however to draw a rectangle uses the simplest overload which simple stretches the white pixel to a rectangle of the
required size and color in sprite.cs
{
Game1.SpriteBatch.Begin();
Game1.SpriteBatch.Draw(Game1.SpriteTexture, new Rectangle((int)(Location.X + .5f), (int)(Location.Y +.5f), (int)Size.X, (int)Size.Y), Color.White);
Game1.SpriteBatch.End();
}
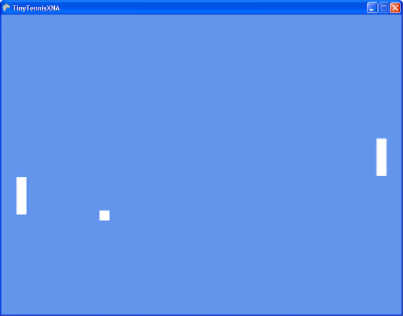
Now if you run the game you will see the bats and balls on the screen. The final
thing is to add the new keyboard code. Since there is no events in XNA you need to simply check each time around the game loop if the key is up or down,
Just like everything else in XNA this is a few simple lines of code. Replace the humanMove() function in bat.cs with the following:
private void humanMove()
{
KeyboardState keyState = Keyboard.GetState
();
double velocity = 0.0;
//Set the velocity of thesprite based on which keys are pressed
if (keyState.IsKeyDown(_upKey))
{ velocity += -_speed; }if (keyState.IsKeyDown(_downKey))
{ velocity += _speed; }Velocity.Y =
(int)velocity;
}
Now you can play the game. The keys Q and A control the bat on the left
and the bat on the right uses some rudimentary AI.
Running on the Xbox
As I
mentioned earlier running on the Xbox is something I will cover in the next article. But I’m sure you want to try so here are some pointers:
- There is no keyboard on
the xbox so you will need to replace the key press code with reading the xbox
controller instead
- Sound on the xbox is done using
XACT so the SoundPlayer class is not available. You need to create an XACT project and add the .wav file to that
Take a look
at the SpaceWar sample for examples of ow to do both of these things – or just wait till next week.